Adorable and Spooky Halloween Bento Box Lunches
Fall is here and Halloween is just around the corner! Are you ready for some Halloween Bento Box Lunch Ideas?!
Let's spark some fun ideas for creating awesome Bento Box Lunches your kids will Love & EAT!
We are a Halloween loving family so it is only natural that I'd have to make Fall and Halloween themed Bento Box lunches for my daughter!
As I am sure you know by now, last year was the beginning of my Bento Box Lunch creations. All of these are from last year, which started my obsession with creating “themed” lunches!
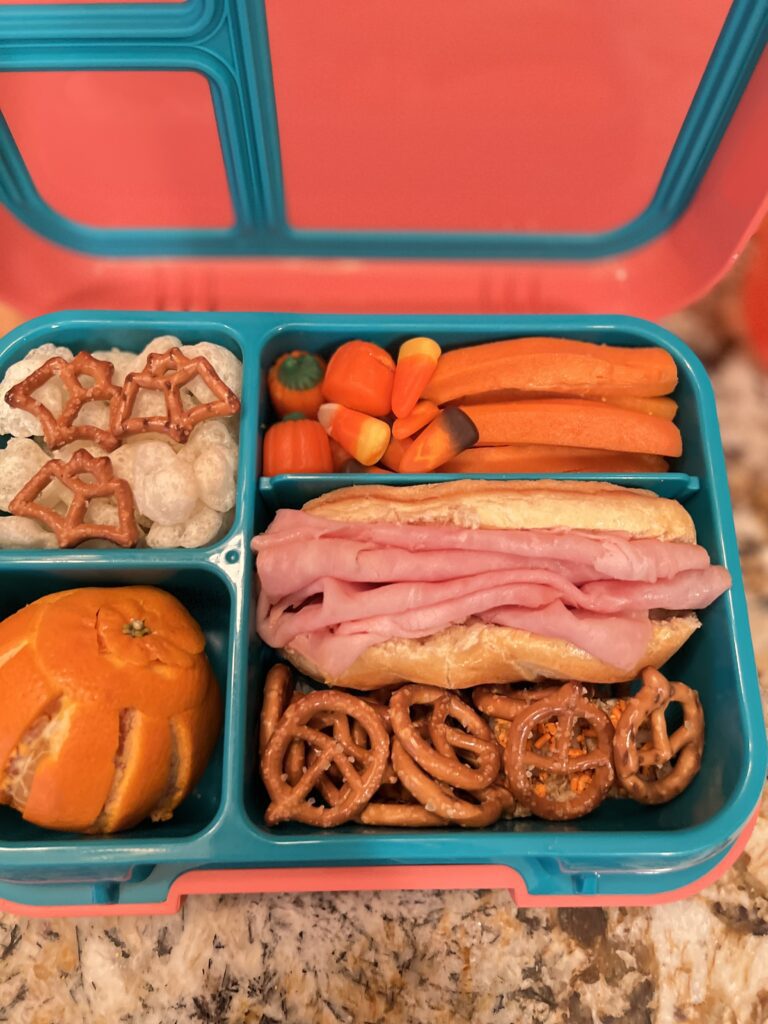
Even though I didn’t have a lot of fun tools yet, I used what I had at the time! Check out my other more recent Bento Box Posts here for more inspiration.
Luckily, with what I had on hand already, I was able to get creative and used cookie cutters for sandwich shape cutouts.
As well, I found whatever I could to create some fun Fall and Halloween themed lunches.
At home one weekend, we decided to have a tea party so I made cucumber pumpkin tea sandwiches!
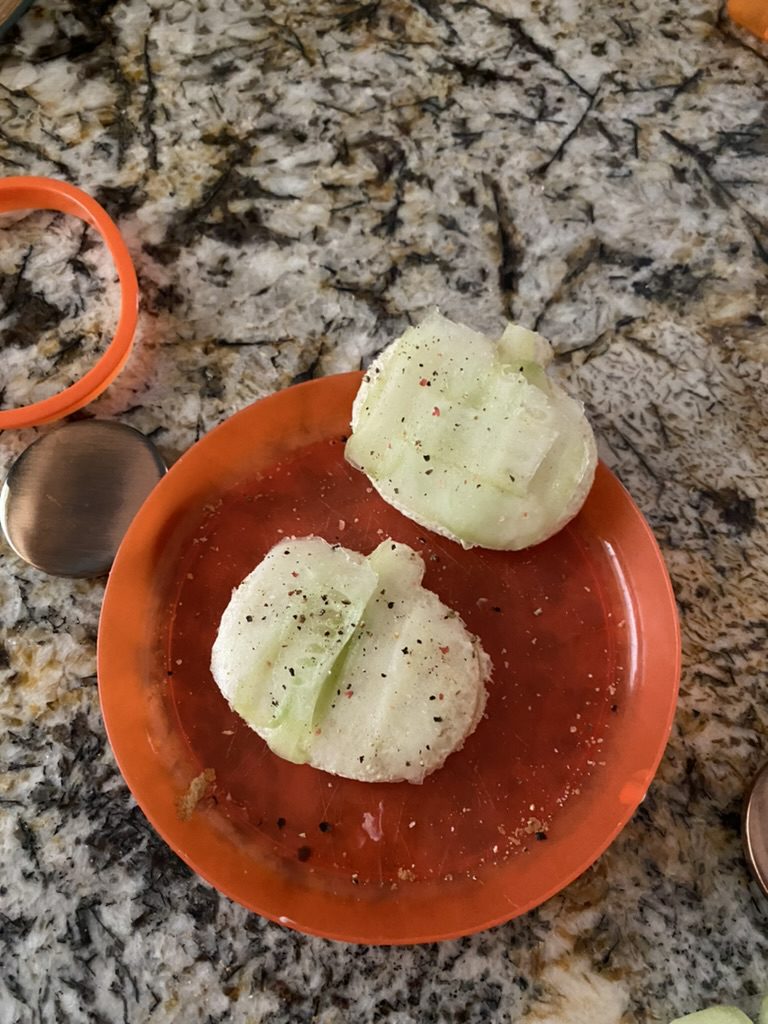
These little pumpkin sandwiches were a tea party hit and became a Bento Box inspiration!
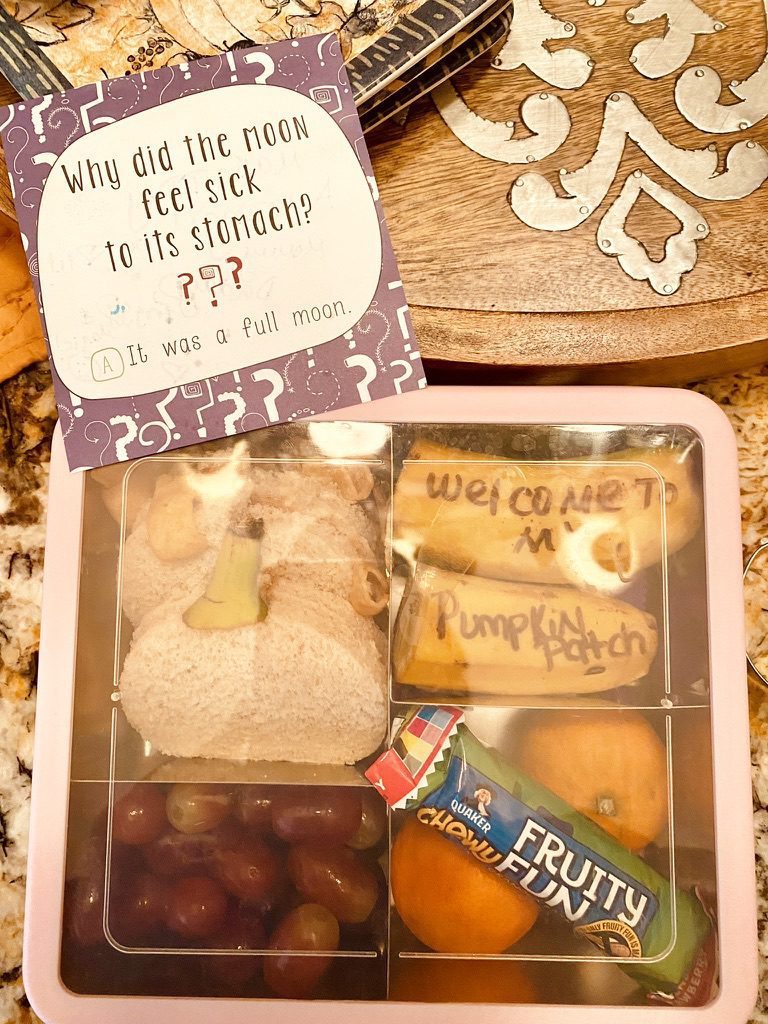
Last year I only made a few Fall themed lunches, as I was just hitting my stride with the themes. The banana stems worked really well as “pumpkin stems”!
This post may contain affiliate links. This means I may receive a small commission for purchases derived from those links at no cost to you. This helps support the blog. Thank you in advance for your support!
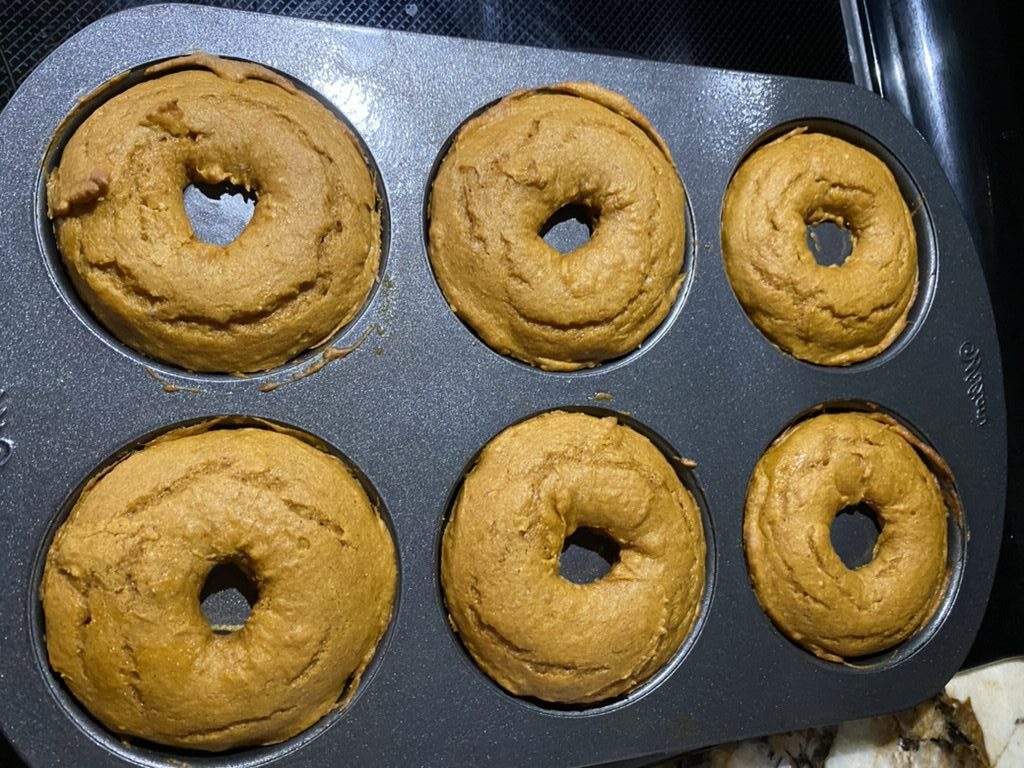
When Fall came around last year, I had already been planning to make my usual “Baked Pumpkin Donuts” (I make them every year, and even my hairdresser requests I bring her a batch)!
My love of baking has been around a while, and I do try to cultivate it whenever I can, and if I can make something healthier, that is always my goal!
Donuts….we love them! So much! Yes, they are not “healthy”, so I limit our interaction with the normal “fried” ones.
Due to that deep love of donuts, years back I got some donut pans for “baking” healthier donuts.
Several years into baking donuts, I have perfected my easy, healthy, 100 calorie pumpkin donut! YES, THEY ARE AMAZING!
Healthy Pumpkin Baked Donuts - I add these into her Bento Box Lunches too!
These Wilton donut baking pans are awesome! You’ll see I use them to make cinnamon roll donuts, and all sorts of other fun, “healthier” donuts! Let’s keep it real, I was not giving up donuts!
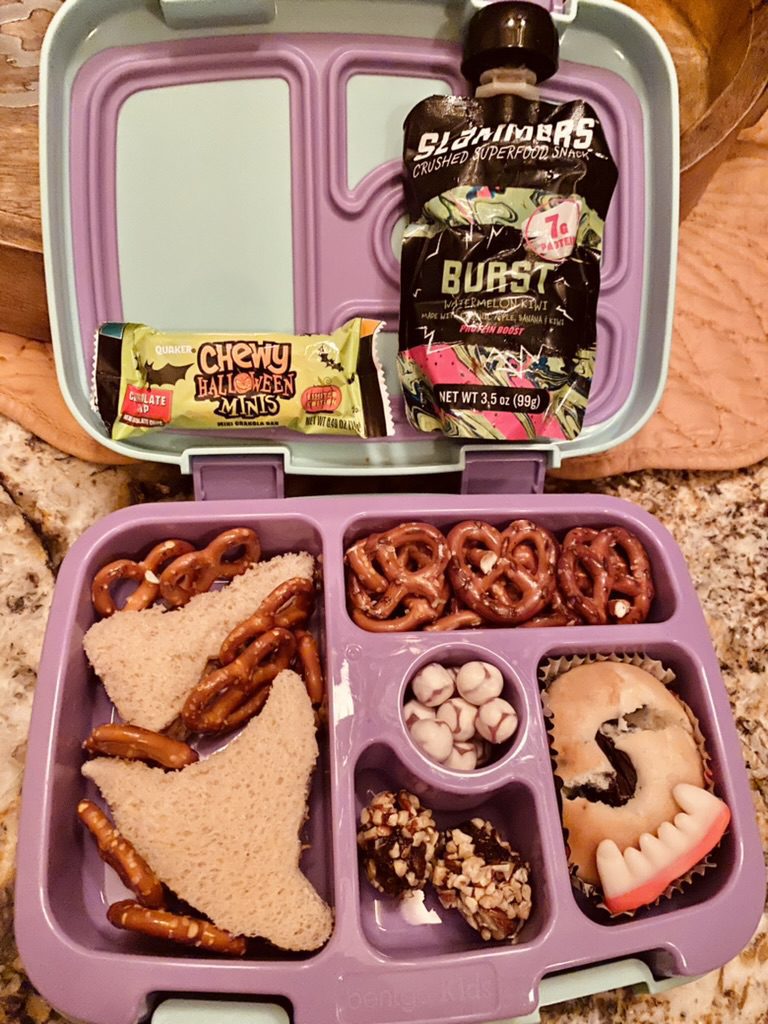
Given my love of baking, last year I experimented a bit and made some healthy blueberry muffins. The blueberries were big and juicy so I decided to stick a big blueberry right in the middle!
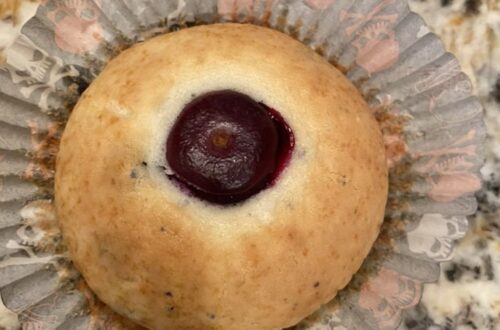
The result…delicious and it looked like an eyeball! This worked out great for the Halloween themed bento box lunches I made!
Muffins are a great pre-made meal prep item to easily add when making lunches. If you don’t know me yet, I am a busy busy bee, so I love anything that saves time!
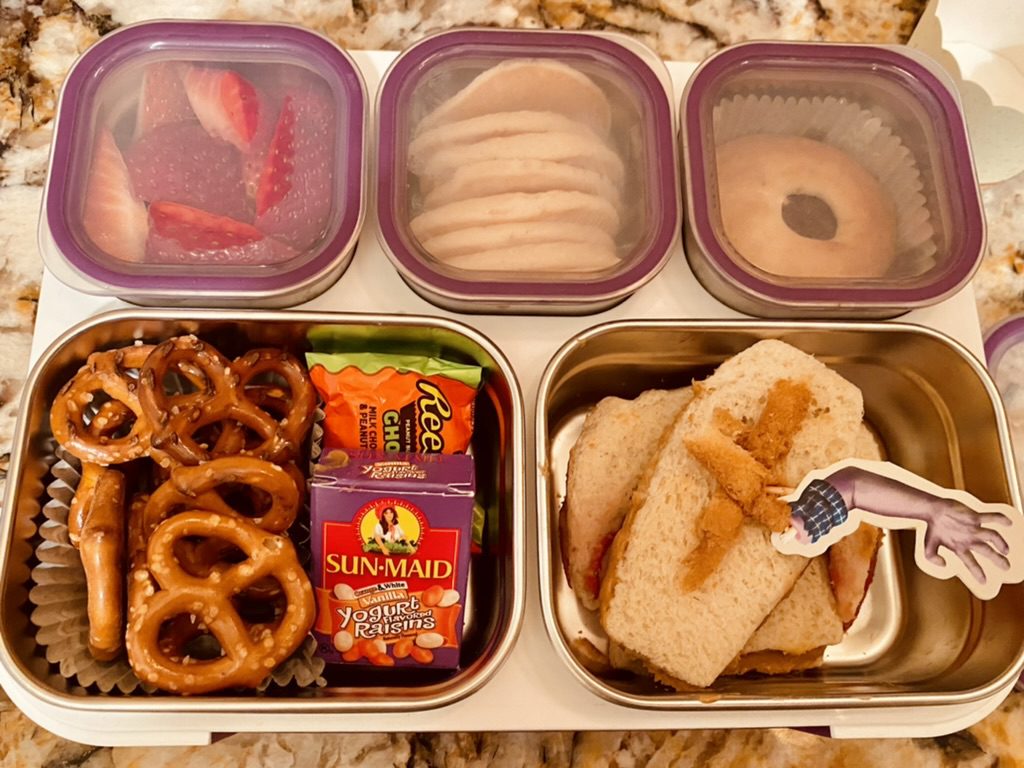
Cupcake sets for Halloween with fun picks work really great to "Theme" decorate your bento box lunches!
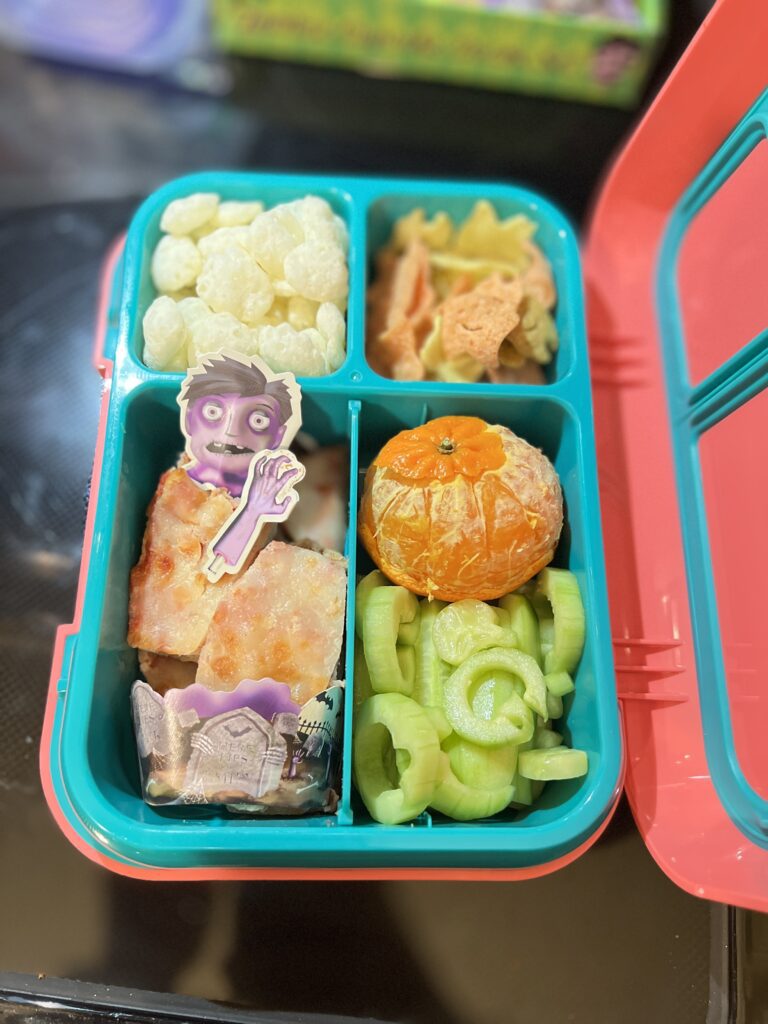
The Zombie picks I used last year came from a cupcake set my mom found on clearance at Marshall's and gave to me.
She knows I love to make cupcakes! Thanks Mom! Likewise, my daughter LOVED IT!
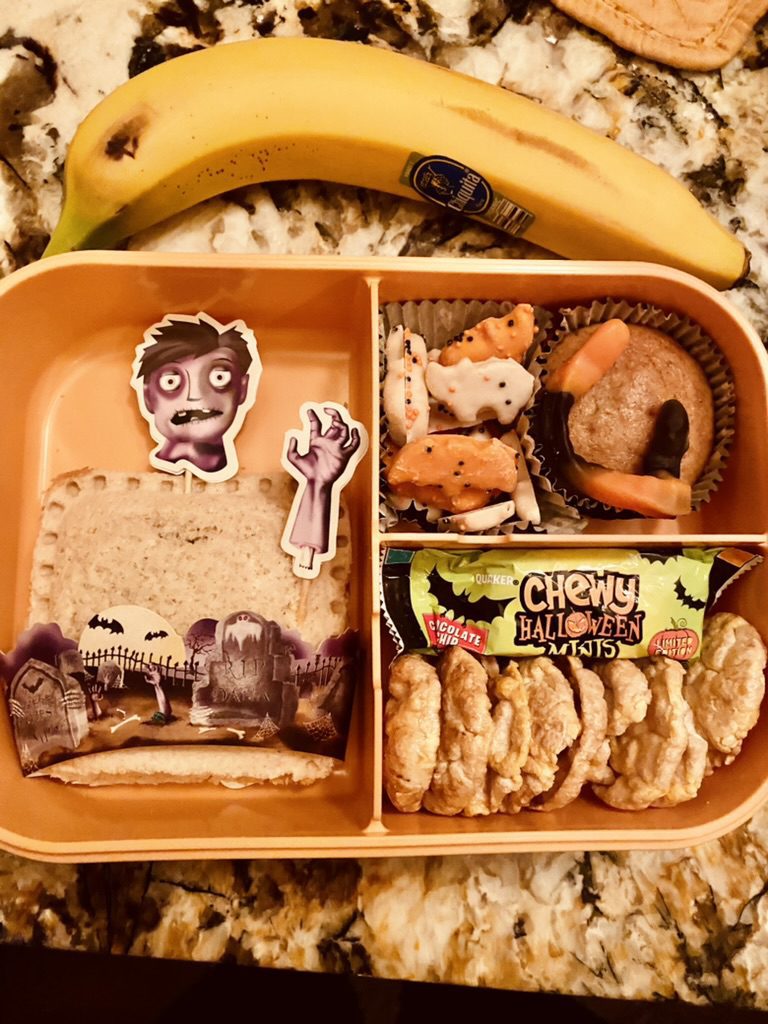
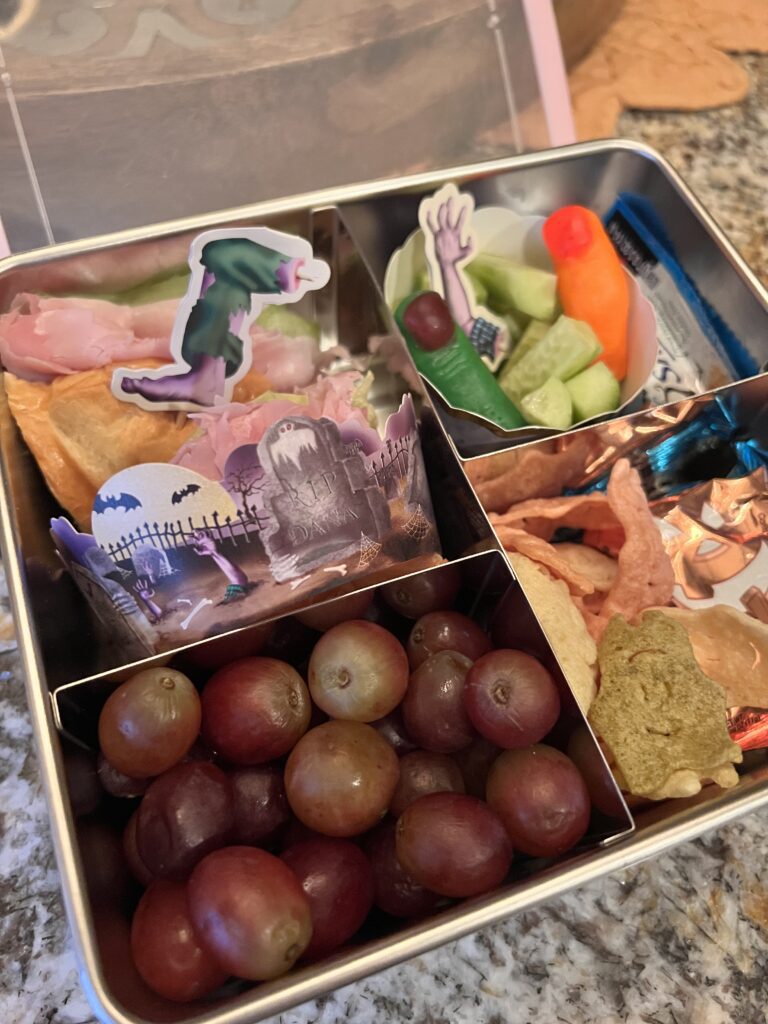
Here in the Zombie graveyard Bento Box lunch you’ll see I used several items from my Grab & Go list below. This was a 3 minute lunch prep quickie!
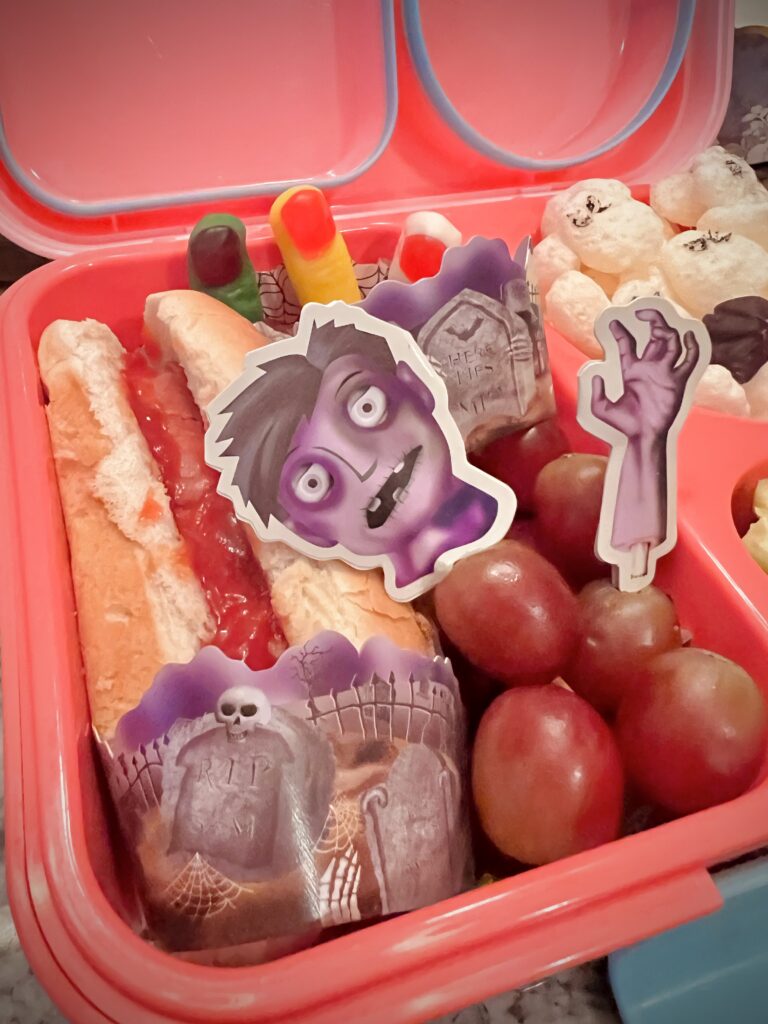
Even though I didn’t have any real “tools” just yet, you can see I still managed to pull together some fun little Bento Box lunch ideas using some pretty basic items.
If you’d like to see my TOP TOOLS FOR BENTO BOXES, Check out these earlier posts.
Each holiday season, you can find all sorts of fun themed snacks, candy, cereals, etc. This is something I always look for and make sure I have on hand for making lunches.
Don’t underestimate the awesomeness of some fun themed cereals as well! Cereal is an easy thing to add to lunch, and it is a fun little treat that always goes over well!
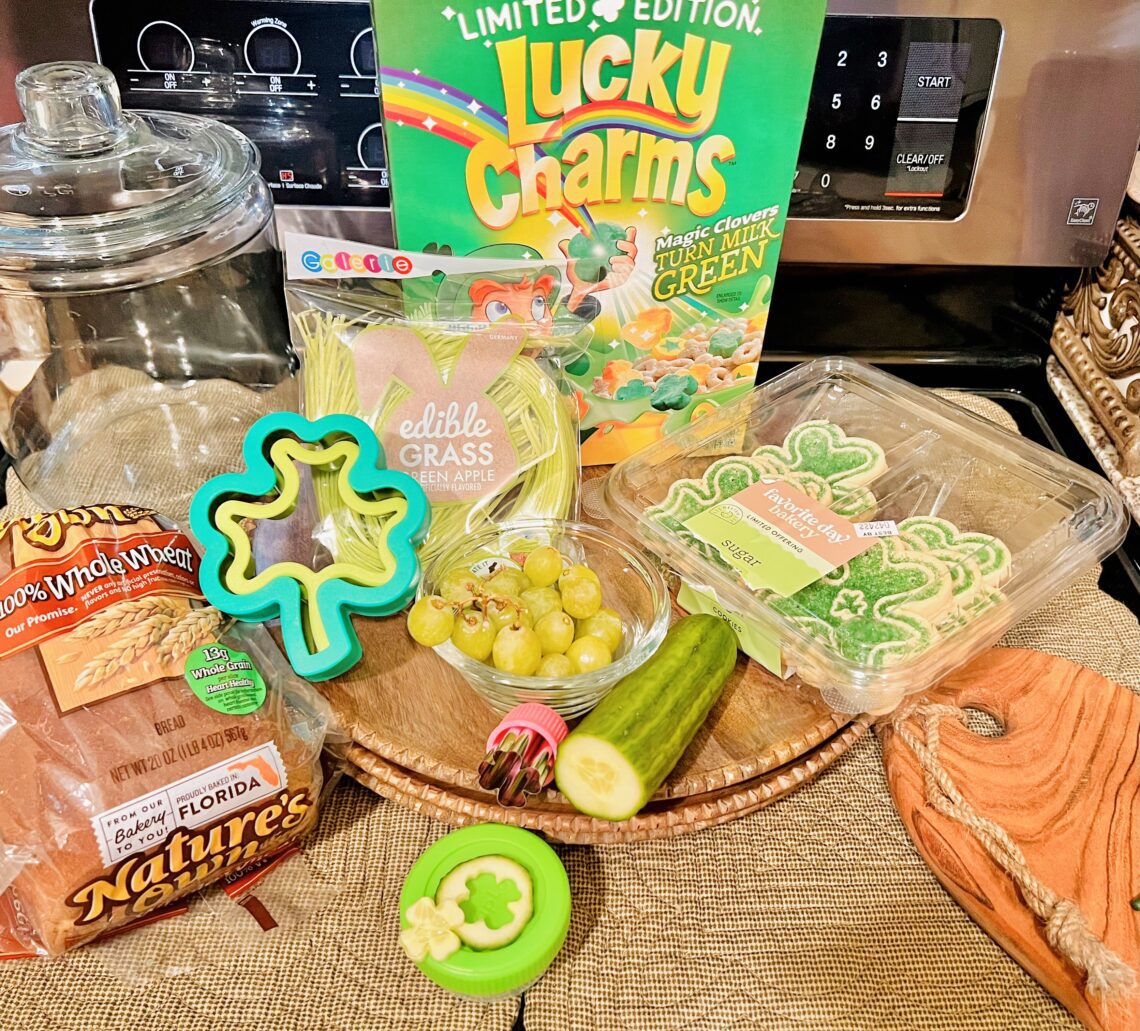
Using Lucky Charms for her St. Patrick’s Day themed lunches really inspired me to start getting special limited edition cereal.
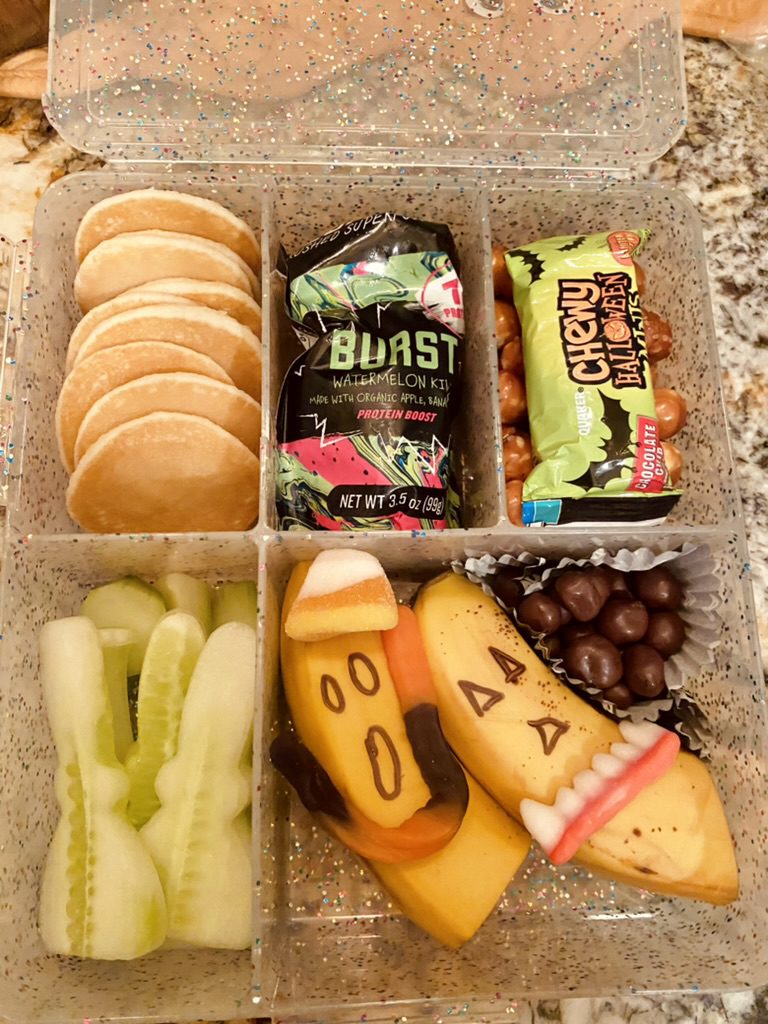
Using gummy worms and gummy candy as a treat and decoration was a huge hit.
While researching ideas on Pinterest I saw some cute Bento Boxes that inspired me, like this skull lunch box from Sugarspiceandglitter.
Pinterest is my go-to spot for finding inspiration, check out my Bento Box Lunch Idea Board for more inspiring content!
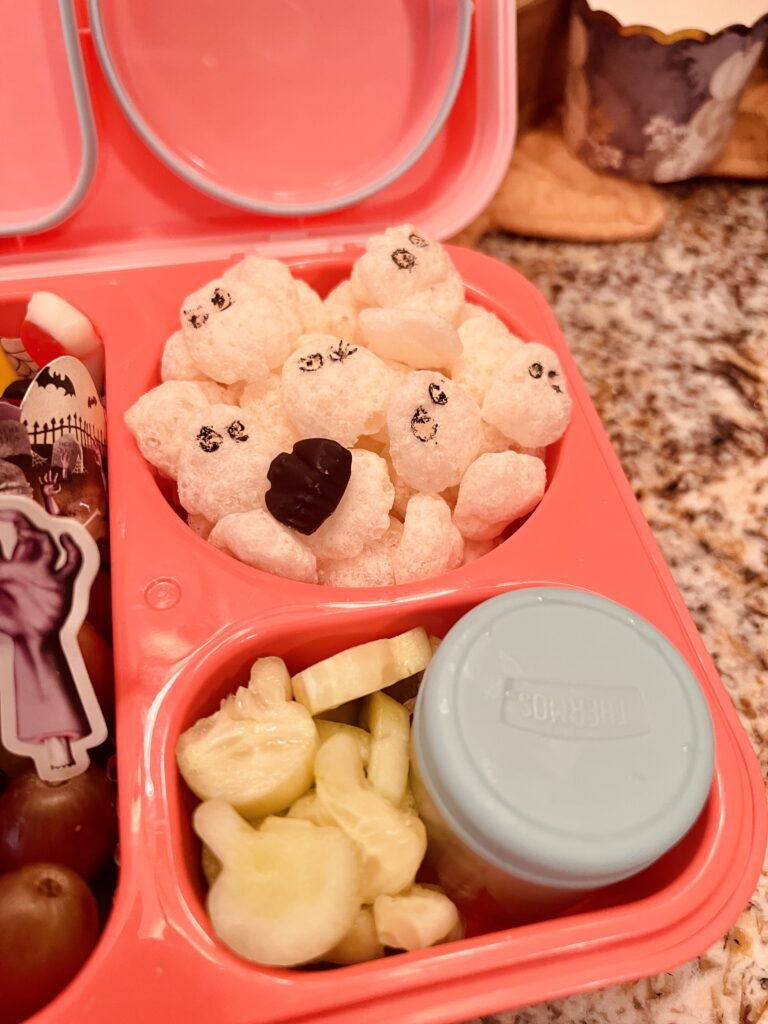
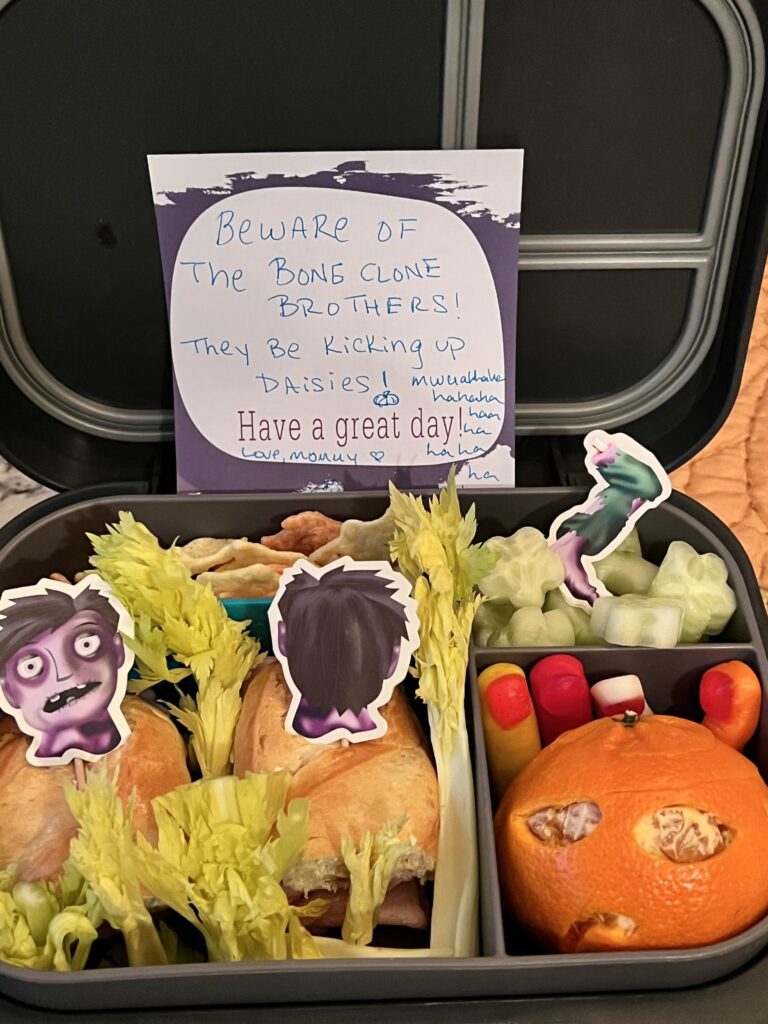
- Mini granola bars
- Cereal
- Utz Mini cheese balls and Pretzel snack bags
- Bananas
- Animal crackers
- Cookies / Muffins
- Cupcake Sets
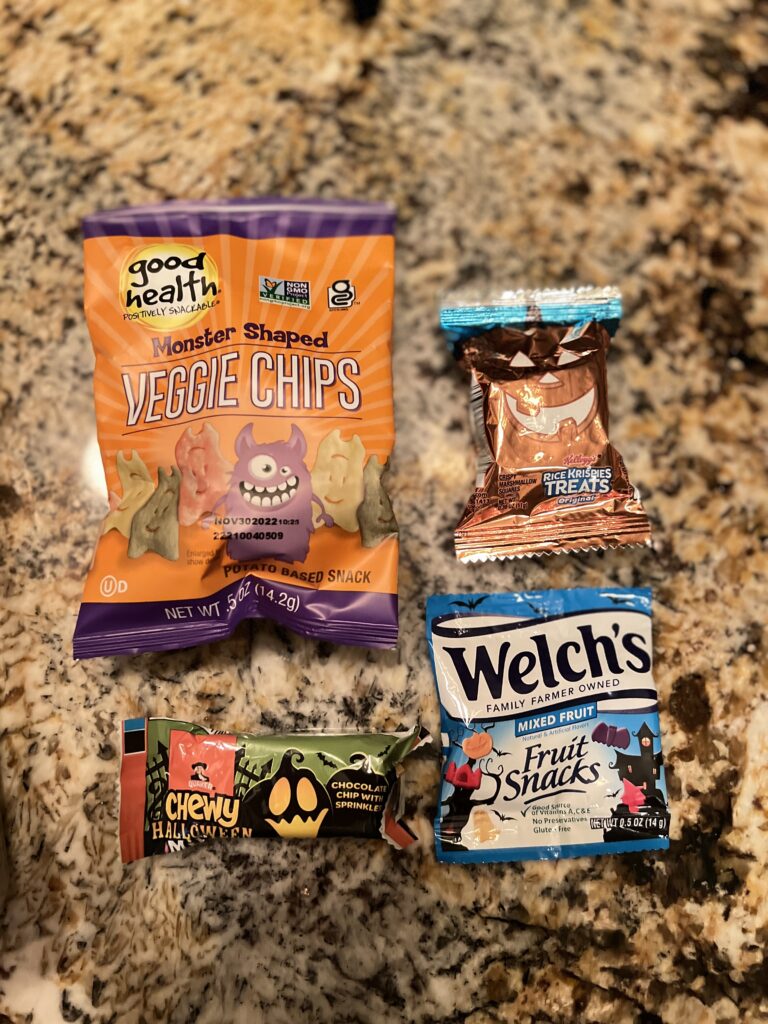
- Holiday theme mini granola bars are great for grab and go! You’ll see in my pictures I use those a lot. It is healthy and she eats them!
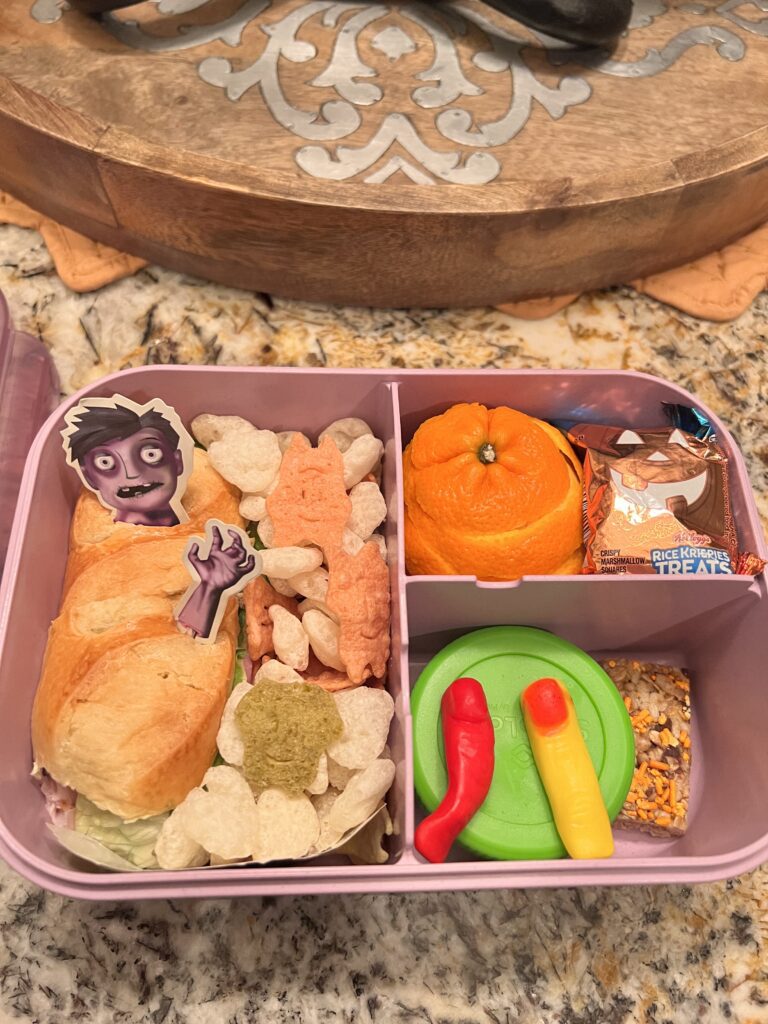
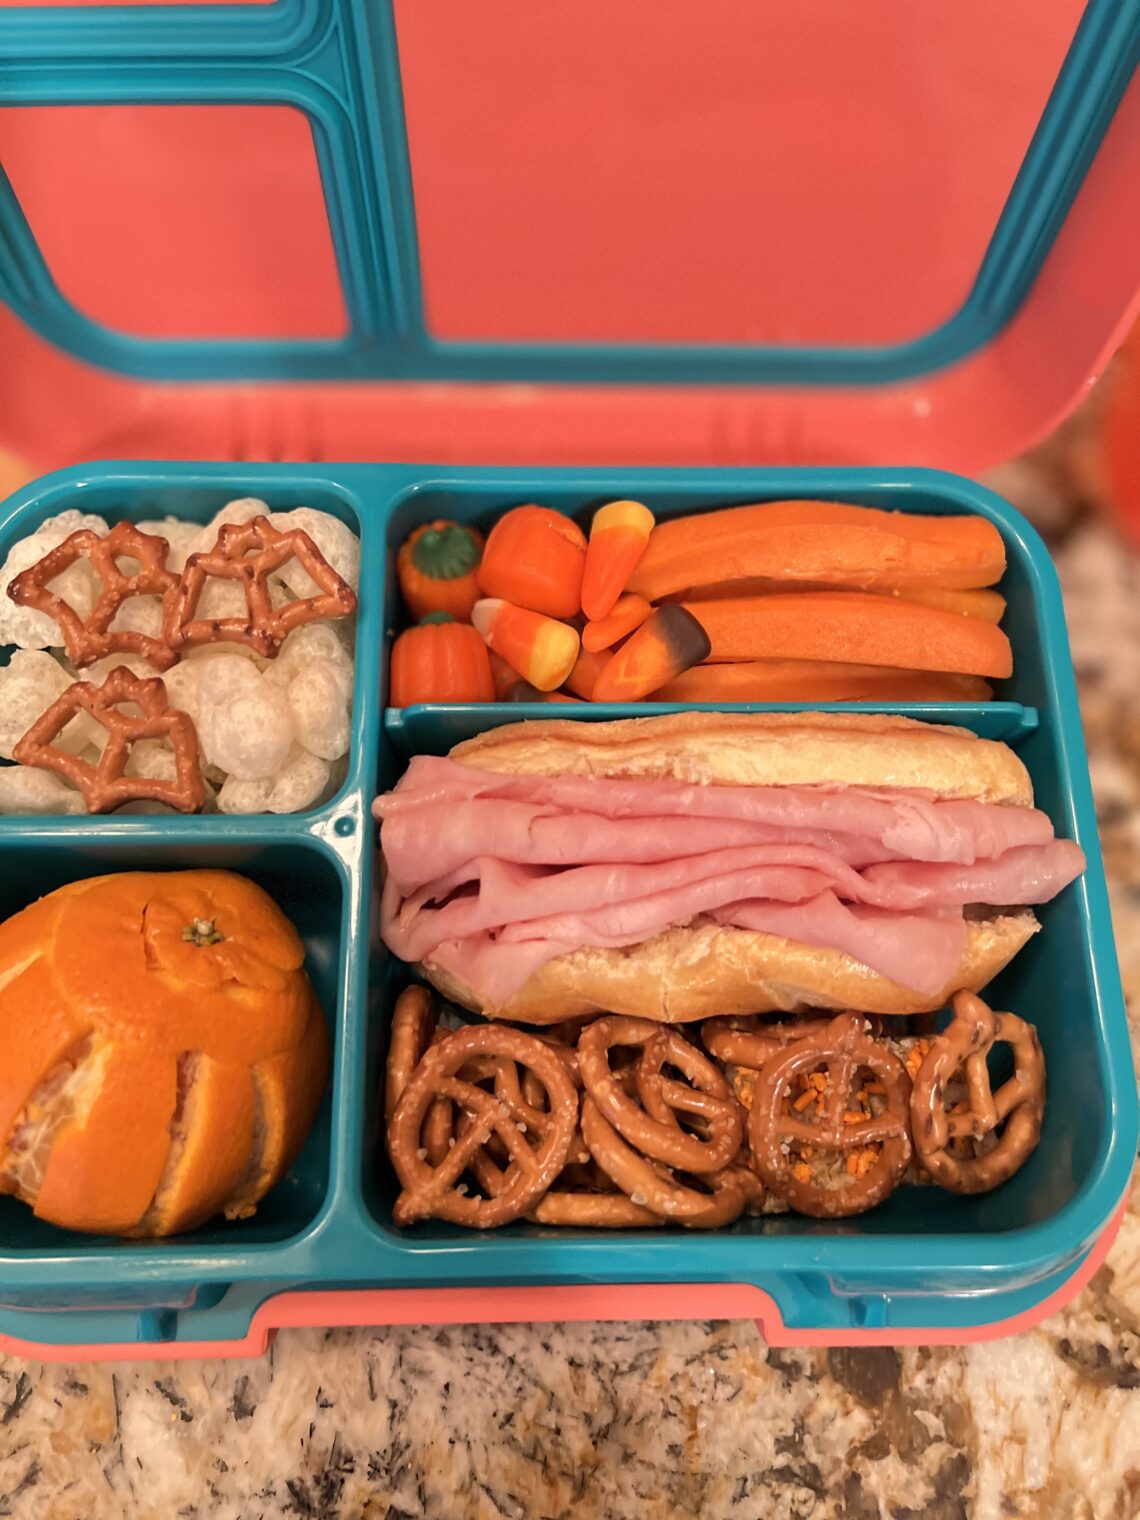
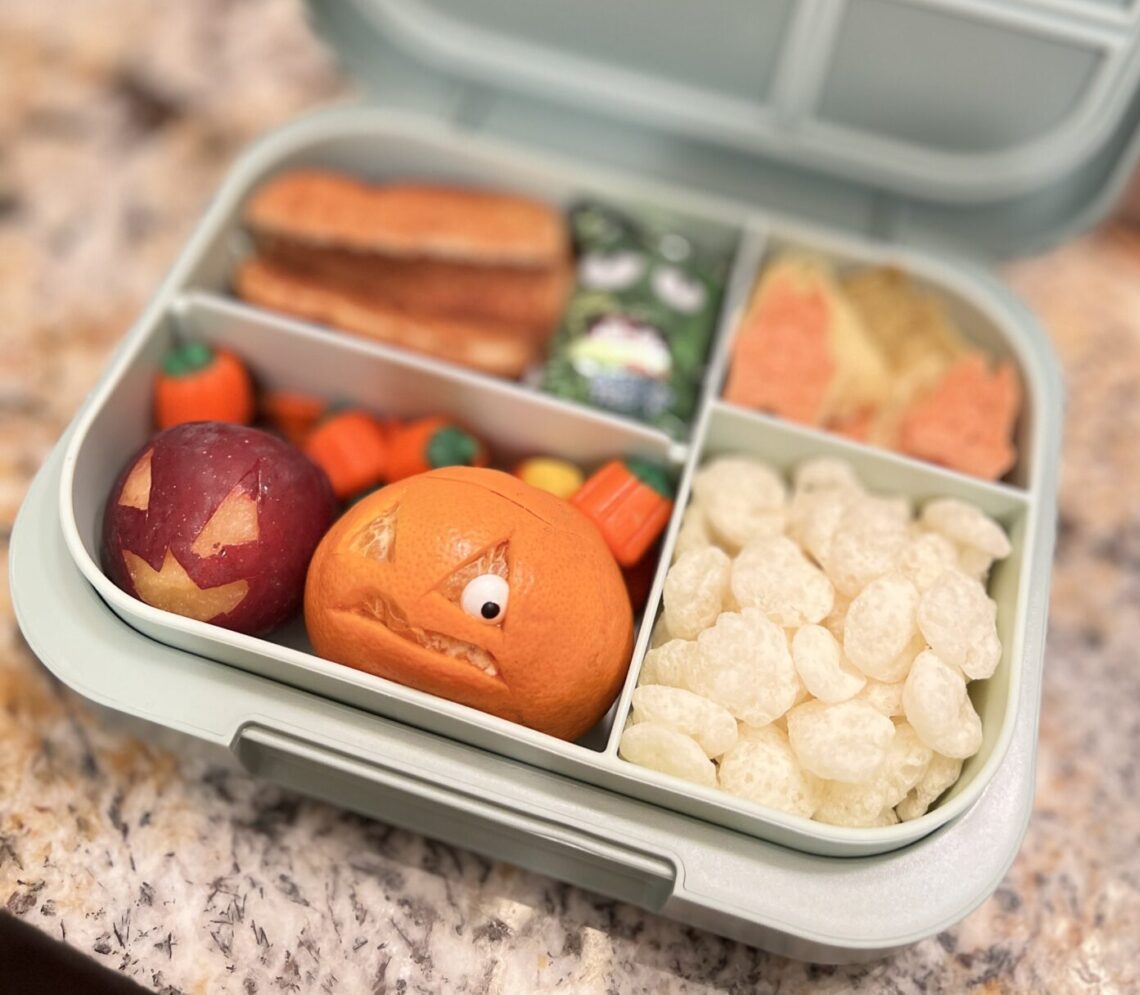
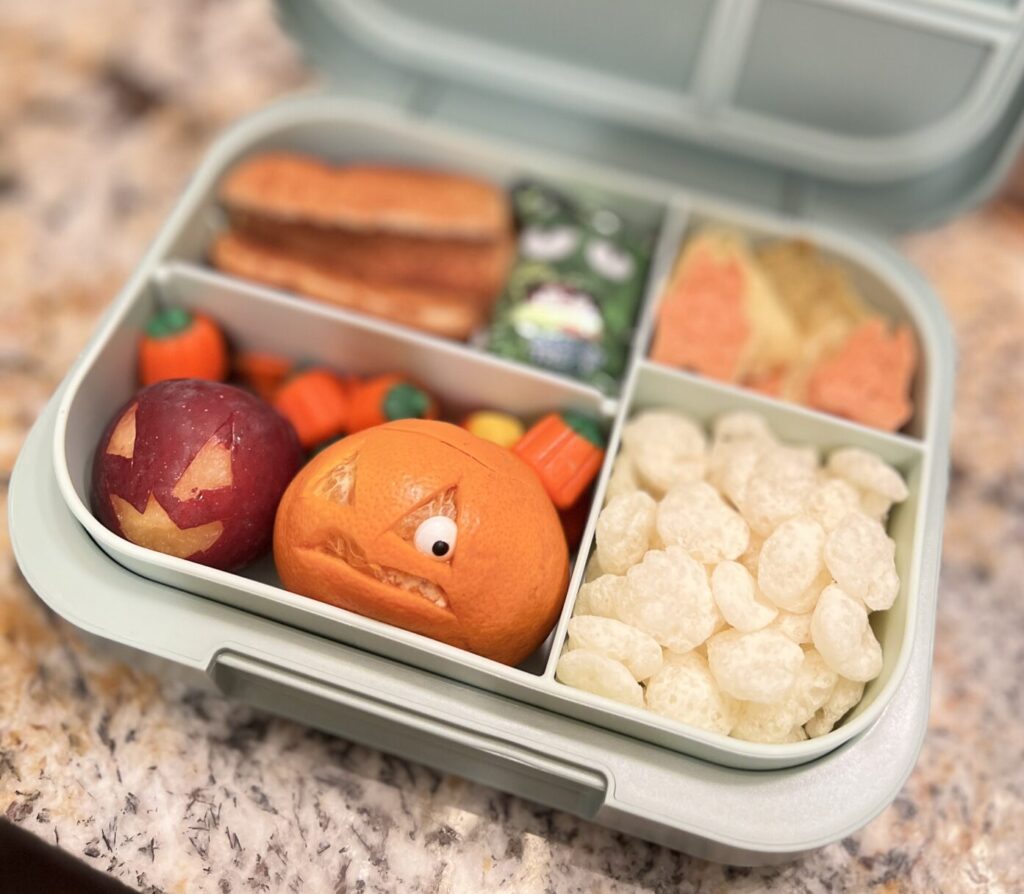
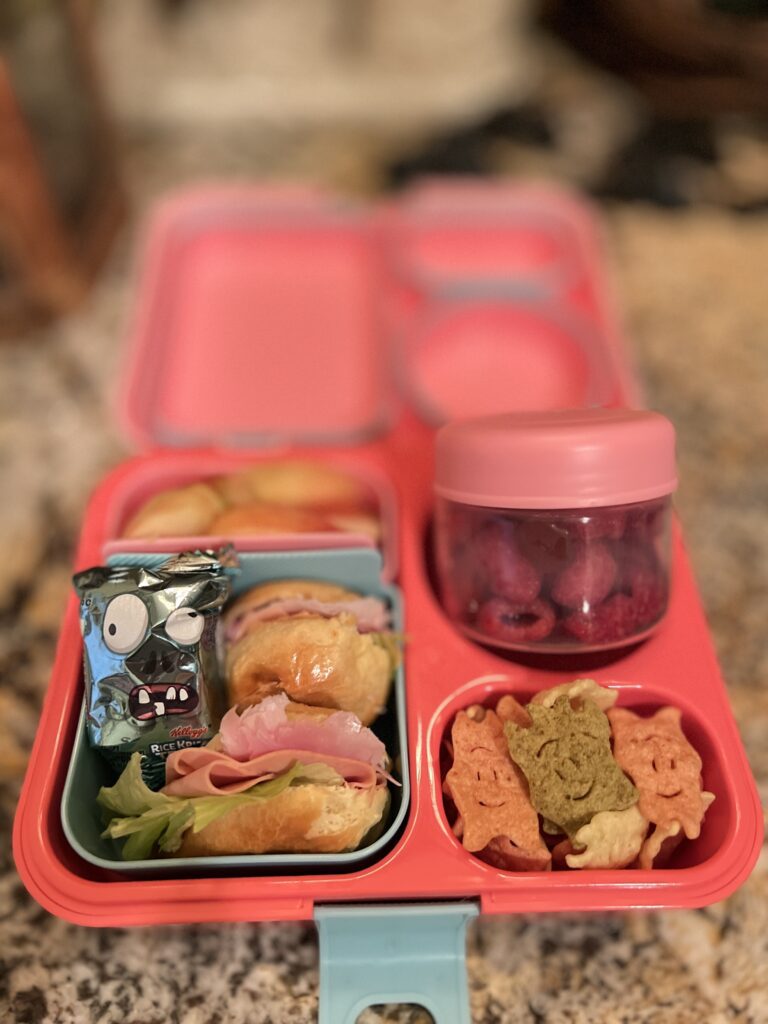
This fast lunch has a mini brioche roll ham sandwich, veggie monster chips and ghost puffs, clementine, Halloween mini granola bar, Halloween pumpkin Rice Krispies treat, gummy fingers on top of cucumber pumpkins inside of leakproof snaplock container.
2. Cereal – This is an easy thing to add to any bento box lunch and there are tons of cool cereals for Halloween! Think outside the cereal bowl!
3. Utz Mini cheese balls and Pretzel snack bags – these are great to throw in as well!
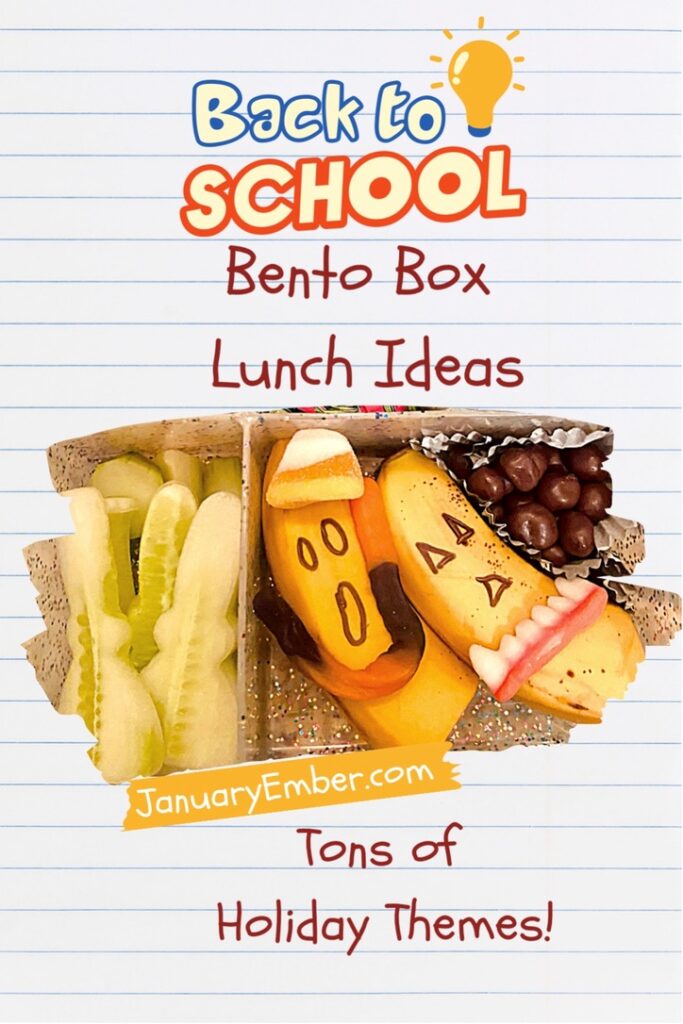
4. Bananas – grab a sharpie and draw on it! Add some gummy teeth and candy eyeballs for an easy Monster!
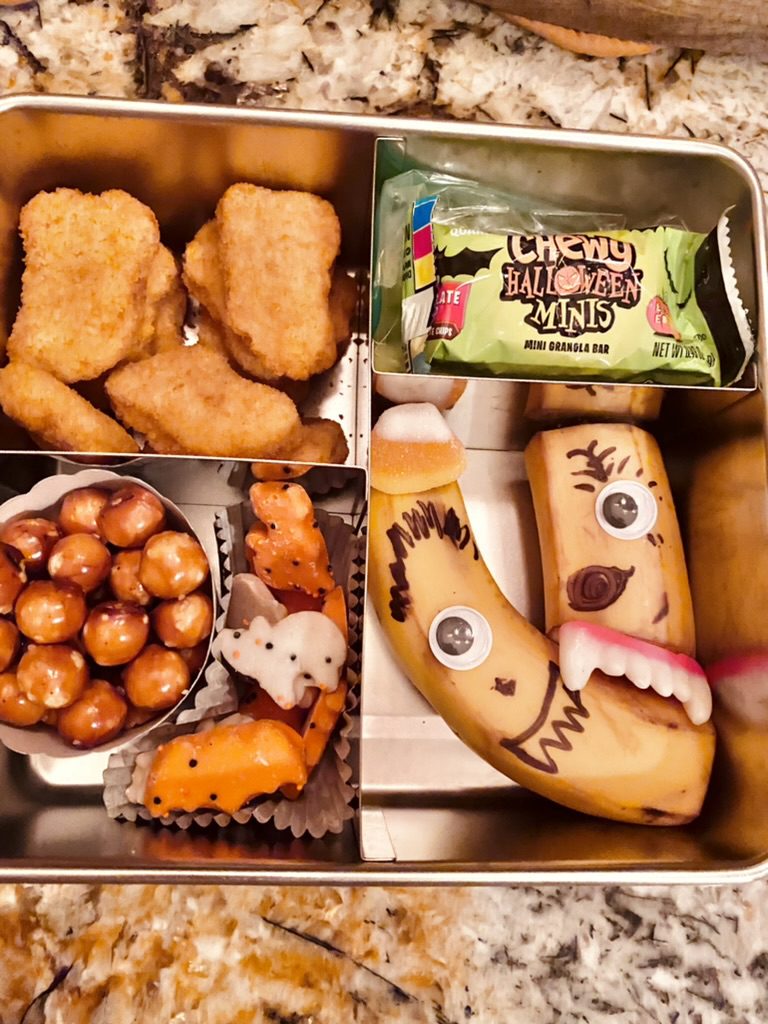
5. Animal crackers – fun holiday themed versions, you can see I have added some cute ones – bats and cats…
6. Cookies/muffins- the stores will have themed cookies, cupcakes/muffins, or you can make them yourself! A fun themed cookie is a nice treat and adds to the cuteness!
Add some gummy candy – this was so fun for halloween!
- Gummy worms, monster teeth, whatever you can find
7. Cupcake sets – use the cupcake liner for snacks, and use the picks and wrappers for decorating – like my Zombie Graveyard!
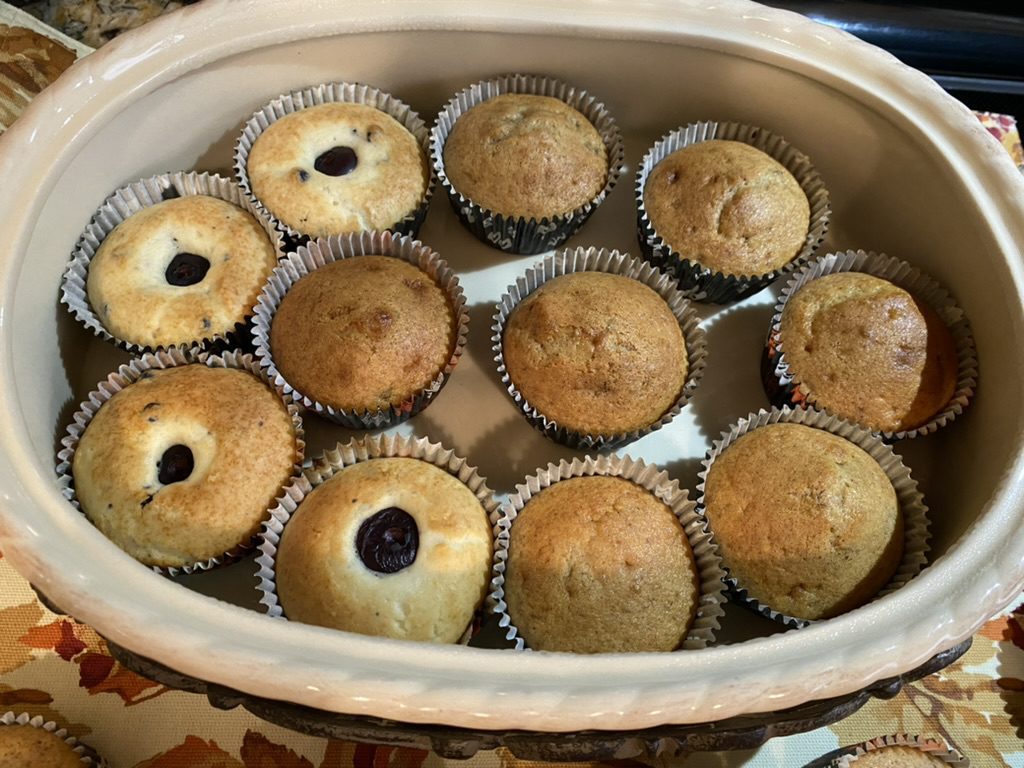
You’ll see I use cupcake liners a lot for dividing snacks, they work great and you can get some really cute fun themed ones!
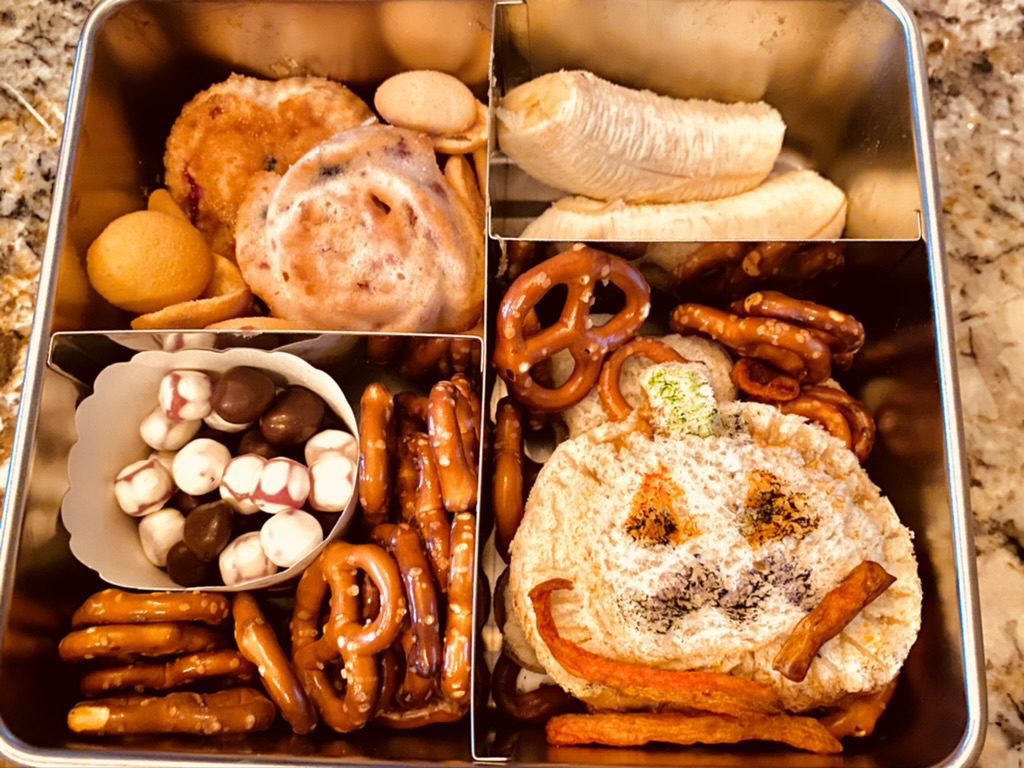
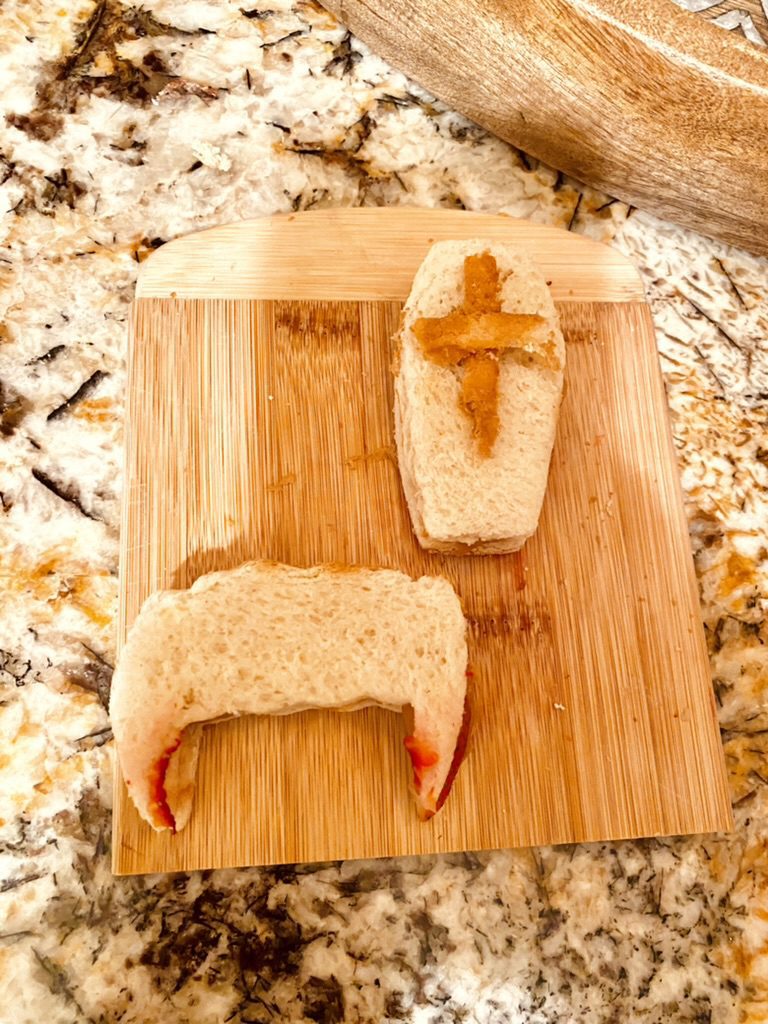
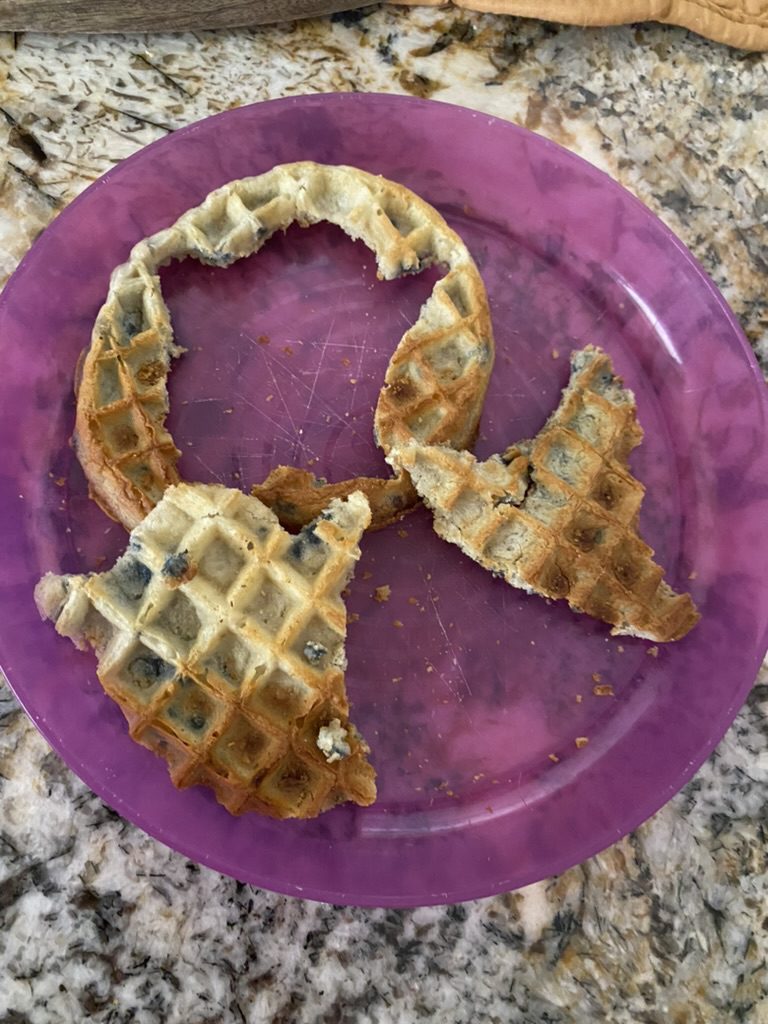
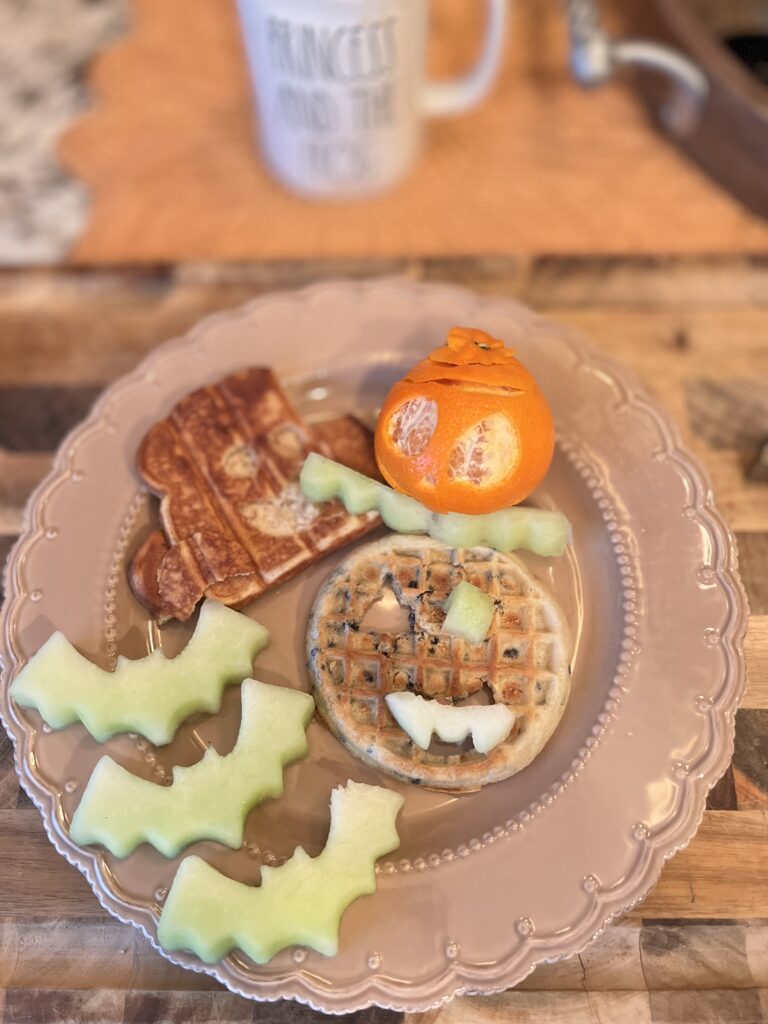
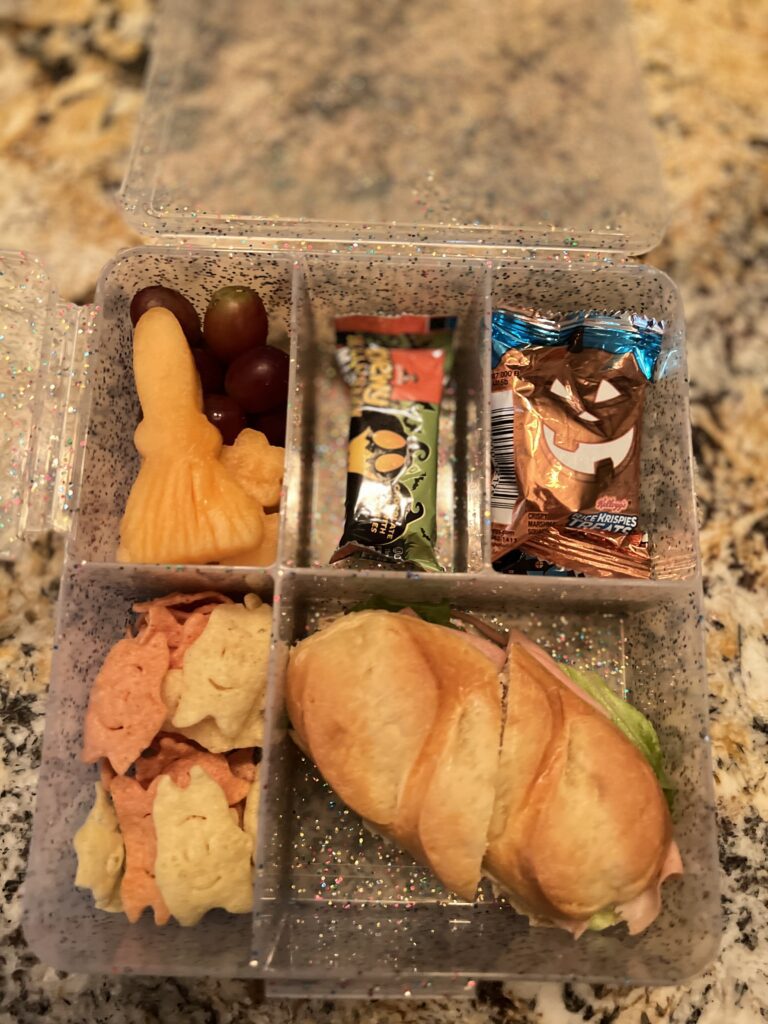
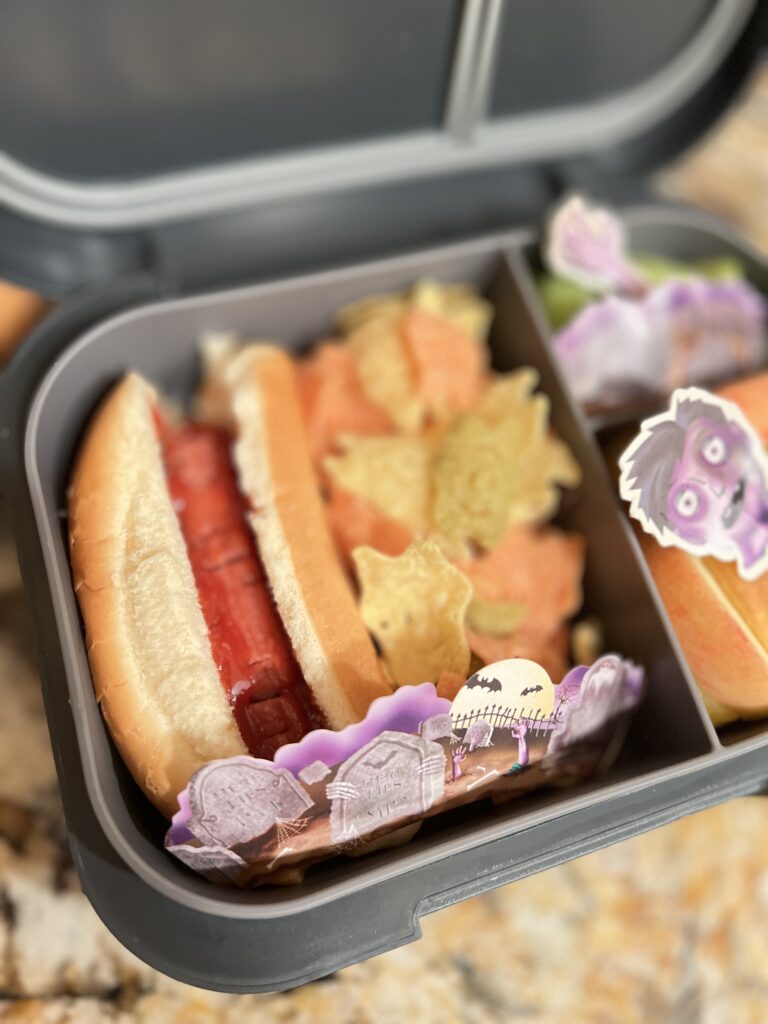
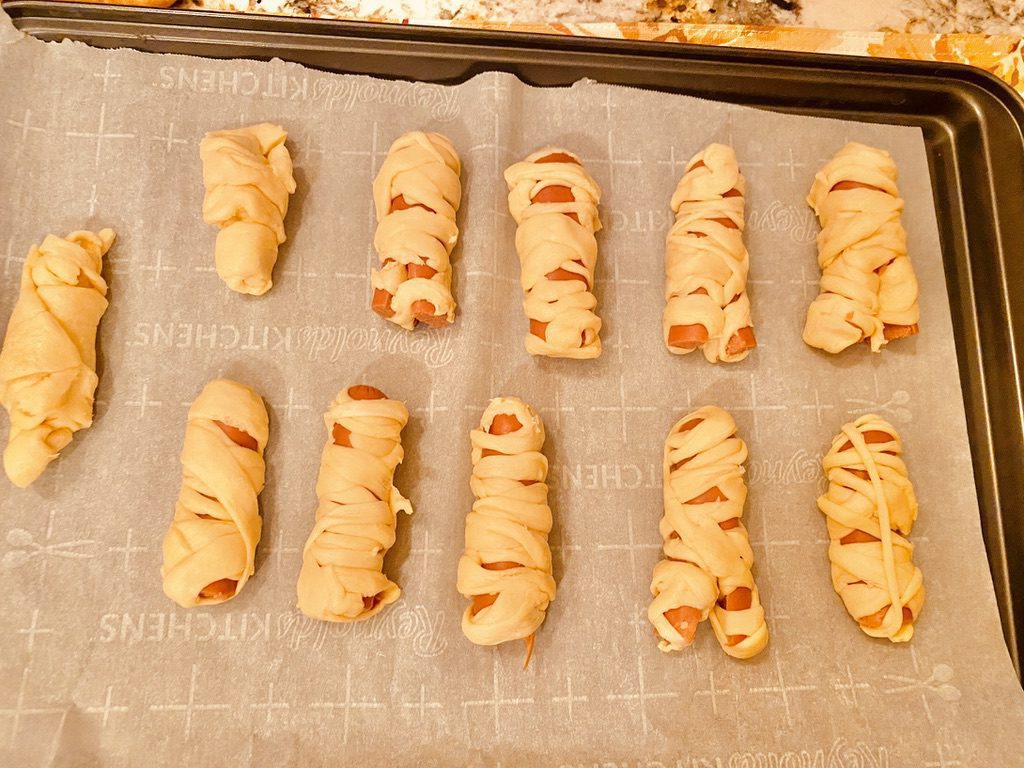
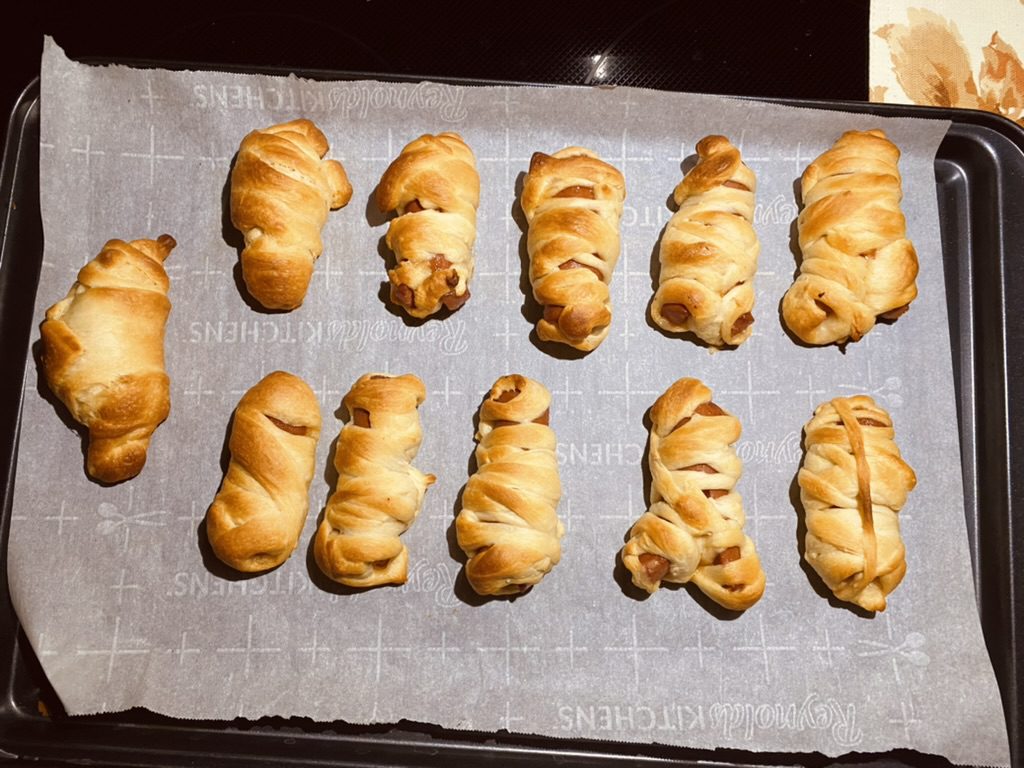
Another fun Halloween Meal Prep Food you can make ahead of time - Mummy Hot Dogs!
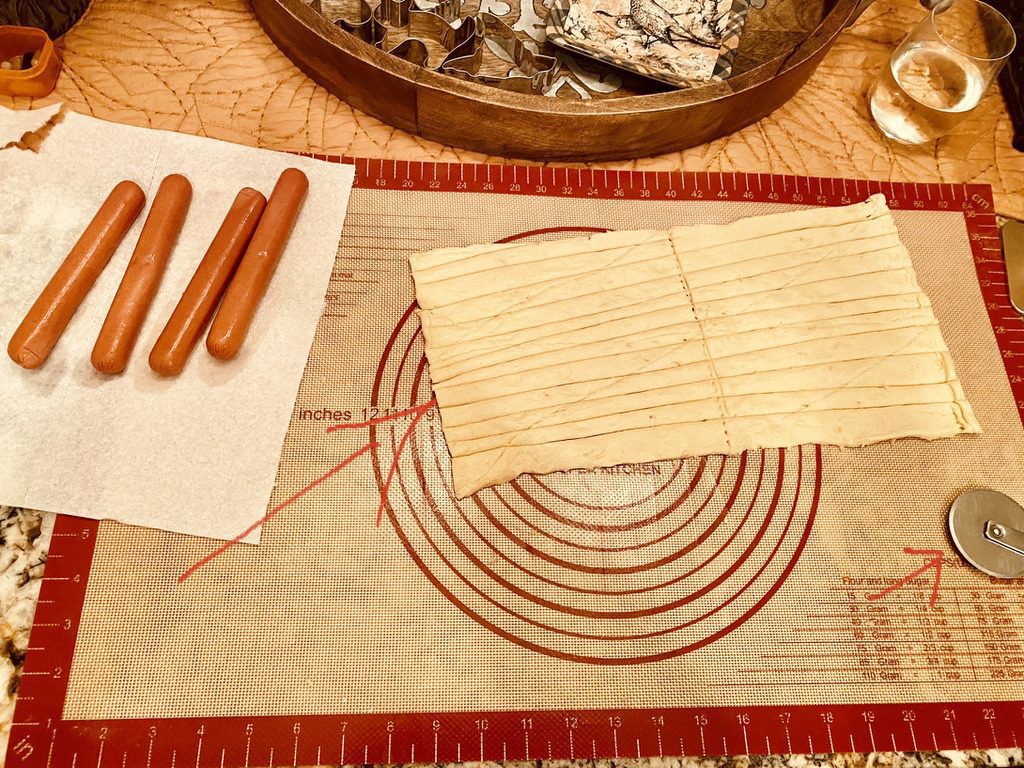
MUMMY DOGS: these are easy to make and super cute! Hot dogs & crescent rolls.
- Roll out your crescent roll dough
- Use a pizza cutter to slice the dough into strips (mummy bandages)
- Cut the hot dogs to create “legs”
- Wrap with crescent roll dough bandages
- Bake according to directions for crescent rolls
This year I'm going to make some crustless sandwiches with this pumpkin sandwich cutter and sealer set! I'll post updates on how those turn out this year!
I hope you enjoyed seeing some of my Fall and Halloween themed Bento Box creations! Subscribe and stay tuned, I've got a lot of Halloween decorating and DIY projects to share!

DIY Cinderella Sewing Book
I saved $400 making this DIY Cinderella Sewing book and mine is much more realistic and authentic!
Cozy Christmas Village stunning CPA Home Office Takeover
Twelve days of Dickens Village, it may be more like 12 months of my Dickens Christmas Village! It took over a month to build, it may stay all year!

Are you smarter than my 3rd Grader? Learn to build a blog post in less than 4 hours!
Are you smarter than my 3rd Grader? How I taught my daughter to write and design a blog post in less than 4 hours!
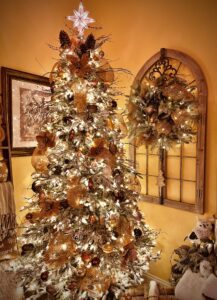
Are Balsam Hill Trees, Wreaths, and Garland worth the money?
My honest, not sponsored review on Balsam Hill, Christmas trees, wreaths, and garlands: are they worth the money? Three years ago when Covid hit, with a limitation of going out, I decided I would start doing some research and forgo the buying of fresh Christmas trees and invest in some good artificial Christmas trees. I did a lot of research and finally decided I would take a chance on Balsam Hill Trees. Sadly, a lot of the higher end, more expensive companies do not have customer reviews on their websites, which makes it difficult to really determine if products are worth it. Personally, I love to read reviews because I feel like that’s one of the best ways to know if something is really good quality. Then we don’t know if we can trust reviews, but if they have reviews, just read a LOT or ALL of them to sift through the paid or fraud reviews. Just because something is expensive, does not mean that the quality is there, and that I will tell you more about as we go on. Balsam Hill does have reviews on their site, but not many. If you are just meeting me then you’ll need to know I’m the guinea pig most of the time. I am often the first person to try something, or buy something…after doing lots and lots of research. My career as a Forensic Accountant included so much research, that you’d think my title would’ve been “Researcher”. Since I’ve been trained as an expert researcher, it is only natural that my researching skills would have to translate into my everyday life. One of the things I love about education is not that it simply teaches you things, or you learn something new…but education teaches you HOW to think! You’ll see I’m a super nerd when it comes to education, because I believe wholly that knowledge is power. Even when it comes to making smart money decisions, having a trained intelligent mind will help you to make better choices, and therefore help you lead a better life. Now that I’ve said my necessary “CPA MOM” speech about how important educating yourself is…let’s continue on educating ourself about artificial trees. As a pure hearted country girl, making the decision to switch from REAL TREES to Artificial was a very hard nut to crack for me. I LOVE REAL TREES! Eight years ago I discovered “Flocked Real Trees”…and I fell in super LOVE! The flocked real trees are amazing and oh so magical. But…here was the issue, or issues I should say. The flocking, while beautiful, is a MESS! The flocking, is SUPER PRICEY! Making each tree (I’d buy 2 flocked each year, 7 Ft and 9 Ft) Price tag of around $700 with delivery! YIKES! The flocked trees lose their smell! One of my favorite things about real trees was the SMELL! I still had to string lights on them! UGH! I had to take the lights off! DOUBLE UGH! It is no fun taking lights off of a dead, dried up tree, and one that is flocked, you not only have pine needles galore, but you have snow everywhere too. 2 Trees needlessly killed…that is sad on its own! After weighing my list of reasons why I should start looking for an artificial Christmas Tree…I began my hunt for a really good quality tree! If I’m doing this, its going to be a GOOD INVESTMENT, or nothing at all! Here you’ll see a Balsam Hill Garland with pine cones and Balsam Hill Golden Pip Berry Picks added, and a few owls (very basic, easy fast additions). One thing you’ll see about me, I don’t mind spending money on quality, but I HATE wasting money on something I could get or make cheaper and better! WASTE is not something I do! Step 1: pulled it out of the bag, and clicked the 3 pieces together. Did not take time to fluff it. This is a 7′ foot tall Balsam Hill flocked tree, it has multiple light settings, all white, multi-color, and color and white. This was a must for us as my 10 year old wanted color lights and I wanted clear! NOTE: if you are like me and don’t like to read or follow instructions…you will end up with a “not so full” looking tree. You HAVE TO FLUFF IT! DON’T SKIP THIS STEP! When I ordered my 7’Ft tree and my 9’Ft tree, I was so excited, I put the 7’Ft tree together in about 10 minutes flat, from unpacking to CLICK, CLICK, BOOM! 1, 2, 3 and it was done. I did not, put the nice gloves on that they give you, or read the instructions which say, “with gloves on, push back the branches one by one to fluff it to give it the fullness you see in online pictures and catalogs. Guys, they fluff them! The trees come in a box, stuffed. They need a little extra love to get them all the way there. The way the branches just “fall” into place is something I really like about how the tree goes together. It makes assembly and disassembly a breeze. Another big plus to me! As I said, the first tree, my family room 7 footer, did not get fluffed on year 1 (I regretted it later, but it still looked amazing). In Year 2 I fluffed more, but still didn’t learn my lesson. This year, I followed the directions! OMG right! I am such a guy when it comes to not reading directions at times, but it seemed easy enough at the time. But I can firmly attest to fluffing these bad boys, i.e. follow the directions on the card and use the gloves! The best part about these artificial faux Christmas Trees from Balsam Hill is the ability to move the branches around. In fact, to get the best look, and fill “holes” is to do just that! You have to move the branches into the position you want. This comes in super handy for larger ornaments that need more space, I can just move the branch to make it hang at the perfect position…something not available on real trees! LOL Golden pip berry stem picks from Balsam Hill – I love these, and bought several sets! I stick these throughout the tree. Step 2: the golden pip berry picks are stuck in bare spots and holes and around the top Step 3: Copper/Gold mesh ribbon, cut into 6-8″ strips, added throughout 2022 Family Room with my 7′ flocked Balsam Hill Tree and matching flocked Garland on the TV stand. Don't miss out! Subscribe now! Subscribe You have been successfully Subscribed! Ops! Something went wrong, please try again. Check out my Amazon board – Christmas Tree Decor Neutral Elegant gold bronze silver There are 2 Balsam Hill Garlands draped over my bed here, this is a wispy pine with pinecones and flocking garland. Note: the lights are awful – wish I had bought them with no lights and added my own. Lesson learned! 2022 Family Room Christmas Decor with my Balsam Hill tree, matching garland and Balsam Hill wreaths. Here I created a Winter Valentine’s Day Vignette – click on the picture to check out my post on creating this style with a few easy crafts and additions. This is my tree still up for Easter! It was snowing somewhere after all! Most of what I’ve shown you so far is just my family room. In these pictures, the Christmas Tree, The wreath on the window pane next to the tree, the golden pip berry picks, and the wood tree skirt crate are all from Balsam Hill. I do love the tree box “tree skirt”. It matched my decor perfectly and it is really easy to put together. The trees are really nice and I have to say the branches have a nice realistic quality to them, especially the snow flocked trees. I bought 2 matching wreaths, but they were not flocked. I also bought 2 matching garlands that were flocked to match the trees. Like I said, had I known, I would buy them without the lights on them. The lights are just the worst! There are 2 strands that take 4 batteries each (8 AA batteries total, for 1 garland)! and they don’t last even a few weeks! They have a remote and timer, but you can get better lights for less that you can add yourself. My major take on Balsam Hill trees, they are amazing; and I love them, totally worth it! My takeaway on the garland and wreaths, they are nice, the LIGHTS ARE AWFUL! A look at my 9′ Balsam Hill tree and a little tabletop tree in front of my big mirror. I LOVE the little frosted Alpine Balsam fir tabletop trees! I have several of these and bought more in the other sizes! I have a 7’ft one in my bedroom, and another in the foyer by the entryway this year. My daughter has one in her bedroom as well! My Aunt calls these ‘Charlie Brown Trees’, even though they are far from! I really love the whimsical look of these Balsam Hill Alpine Fir trees (clearly since I now own 5 of these!) Don’t buy garlands or wreaths with the lights on them if you buy them. They are nice, just don’t get the lights, they take too many batteries, don’t last, and they are a pain to remove! We need to be more environmentally conscious so we cannot use so many batteries…that is something I do not like! Plus it is a pain to keep replacing the batteries every week! Had I known this, I would’ve bought them without lights. I bought several that are flocked and trying to remove the lights is just destroying the flocking! I am super sad about this, so that’s why I wanted to warn everyone about that one aspect. You can get a $5 set of string lights that work better and last longer. Honestly to me, that is the biggest problem and I plan on talking to them and seeing if I can help them get better lights on their garlands and wreaths! I’m on a mission to make all of our lives better and more beautiful! I really love the color changing option on the trees we got, this kept me and my daughter (who wanted color lights while Mommy wanted white) very happy! There is an option for everyone! Thanks for stopping by! Save this and share! Until next time…keep smiling, improve every day, and build a life you love! Yours Truly, January Embark on a journey of inspiration and creativity! Subscribe to my blog and unlock a world of exclusive content, insightful tips, and uplifting stories delivered straight to your inbox. Join our community of like-minded enthusiasts and fuel your passion for inspiration. Don’t miss out – subscribe now for your dose of daily inspiration and let’s embark on this exciting adventure together! Enter Email Address Subscribe You have been successfully Subscribed! Ops! Something went wrong, please try again. Questions or comments? I’d love to hear from you! Drop me a line and Subscribe above for updates! Enjoy this special offer from Meiomi Wines and receive 10% Off your first order with Code: WELCOME10 Special offer from I-800-CONTACTS: 30% off for new customers Plus, enjoy free shipping

My Fall Family Favorites
Fall is that time of year that screams family, so here are some of my Fall favorites! Baking and cooking with my family have been some of my favorite memories. There is nothing like making classic family recipes! The ultimate s’mores basket for a roasting good time! Flaming marshmallow goodness! Trekking through the corn field looking for dropped corn left from the harvest Where I come from, it’s Chili and Peanut Butter Sandwiches! Chili and peanut butter sandwiches, that’s how we do it where I come from! Who says you can’t set a nice folding table! What are your favorite Fall Family Memories? Out in the sticks, Corn fields for days, don’t get more Fall than that! Thanks for stopping by! Save this and share! Until next time…keep smiling, improve every day, and build a life you love! Yours Truly, January Embark on a journey of inspiration and creativity! Subscribe to my blog and unlock a world of exclusive content, insightful tips, and uplifting stories delivered straight to your inbox. Join our community of like-minded enthusiasts and fuel your passion for inspiration. Don’t miss out – subscribe now for your dose of daily inspiration and let’s embark on this exciting adventure together! Enter Email Address Subscribe You have been successfully Subscribed! Ops! Something went wrong, please try again. Questions or comments? I’d love to hear from you! Drop me a line and Subscribe above for updates! Enjoy this special offer from Meiomi Wines and receive 10% Off your first order with Code: WELCOME10 Special offer from I-800-CONTACTS: 30% off for new customers Plus, enjoy free shipping
First Look at the Harry Potter House transformation
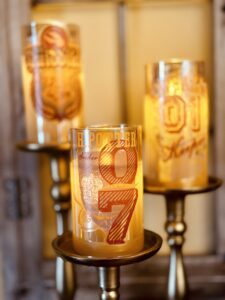
Drumroll please…Here it is, the moment you’ve all been waiting for…my Harry Potter Hogwarts House transformation first look reveal! Makes sure you have your Luna Lovegood Spectrespecs on like Froggy does, you don’t want to miss anything! Last year sparked the beginning of our Harry Potter obsession, and I can justifiably say, it more than qualifies as an obsession! When my daughter said she wanted a Harry Potter Birthday, I was on the job with making magic in mind! We love to go to theme parks like Universal Studios and Disney, why, because we want to be immersed in the experience, we want to feel like we are IN the movie. That is the feeling I wanted to create in my own for the party. I wanted these kids to feel like they just walked off the train and checked their bags for orientation at Hogwarts. To start this off, I want to show you the easiest thing I made for the party, so if you are looking for a fast, easy decor idea, then look no further! The easiest thing I made for the party: Harry Potter flickering LED candles. One of my absolute favorite things I made for our Hogwarts House transformation, were these super easy Harry Potter candles! With just 2 things needed: an Led candle and a rub on cling (Harry Potter themed in this case) – and 2 minutes later you have a custom, removable, specialty candle! Don’t you just love easy things like that! Jump to: Shop my Harry Potter Idea List on Amazon click here! This is as easy 1…2…3, just peel & stick! Can it get any easier than that? These peel and stick Harry Potter decals work really great on these glass flickering LED candles! I use this style of LED candle all over my house. I added peel & stick decals to many of my different candles around the Hogwarts House. Get creative with some of these decals, they are easy to add and remove for an easy Harry Potter themed decoration! You have to be crazy close to even see the outline, from a distance you can’t even see it. I had these 2 lovely Rae Dunn Pitchers, one yellow that says “LEMONADE” on it, and one white that says “ICED TEA” on it…other side blank! Ah Ha! I can attach a cling to that! Instant Harry Potter themed pitchers! Slytherin and Hufflepuff worked perfectly for this! Rae Dunn Lemonade and Iced Tea Pitchers – added a cling to each! Love it! Here is a look at the table setting and table runner decor on my Kitchen Island Bar – table for 4 elite Hogwarts students, step right up! I found these melamine plates on Amazon and I just fell in love! I layered them with my existing charges, and plates. When you want an elegant table setting, think LAYER, LAYER, LAYER! You’ll see a lot of my holiday themes involve only one “themed element” and the rest is my stuff I already use for day to day styling! To Shop my Harry Potter Idea List on Amazon click here! These melamine Hogwarts House Crest plates are really lovely! Layer with several chargers for an elegant look! Hogwarts House crest plates add an elegant touch to the dining table! Another adorable peel & stick on decal – I added these to my Rae Dun Lemonade and Iced Tea Pitchers! The scarf worked perfectly for the table runner. Froggy loves his Hogwarts House! Another lovely set of candles on my accent wall, these Hogwarts House crests look amazing! I love my little Gringott’s Bank with the goblin cameo in my office, it worked out so nicely! You can see how I always move things around… Gringott’s Bank Create little nooks where you can with different movie scenes you love. I hope you enjoyed seeing the first look at how the Hogwarts house took shape. It changed many, many, many times, so you’ll see a lol of different stuff moved around. That’s the only way to truly figure out where you want things to go, stick it there, then move it! There is a lot more to come so subscribe and follow me on social media for new updates. I’m really excited to see how Halloween is going to come to life in my house this year, especially since I have so much amazing Harry Potter decor now! Save & share! Until next time… Keep smiling, improve every day, and build a life you love! Yours Truly, January Ember Embark on a journey of inspiration and creativity! Subscribe to my blog and unlock a world of exclusive content, insightful tips, and uplifting stories delivered straight to your inbox. Join our community of like-minded enthusiasts and fuel your passion for inspiration. Don’t miss out – subscribe now for your dose of daily inspiration and let’s embark on this exciting adventure together! Enter Email Address Subscribe You have been successfully Subscribed! Ops! Something went wrong, please try again. Questions or comments? I’d love to hear from you! Drop me a line and Subscribe above for updates! Enjoy this special offer from Meiomi Wines and receive 10% Off your first order with Code: WELCOME10 Special offer from I-800-CONTACTS: Save up to 30% off for new customers Plus, enjoy free shipping


You May Also Like
My Fall Family Favorites
October 10, 2023